Building material delivery and storage:
Prior to log package delivery and set up, foundation and first floor system must be completed and ready to bear structure.
All concrete must be cured and the first floor system must be fully nailed and anchor bolted to concrete walls.
Access in and out to building site by a 48’ truck- trailer with crane must be provided by owner to receive the log shell. Any additional cost to transport material to the building site not directly accessible by truck-trailer is the full responsibility of the owner-buyer.
As far as possible, material should be delivered to the site just before it is used. As soon as the log structure is erected and thru bolted, the roof system should be completed.
The protection of building materials on the site and storage before use are very important in the normal staging of construction.
The framing lumber and sheathing materials are delivered to the site after the foundation is completed.
The log package is trucked to the site on consecutive days so logs may be unloaded and placed by crane in proper sequence.
Try to arrange log delivery when local weather does not call for rain, snow or heavy wind.
To protect the newly erected log structure from rain and sun damage, install a roof on the house as soon as possible.
For example a Styrofoam structural insulated panel roof is a quick way to get a roof cover in day’s right after the log shell is up.
Logs and framing materials in place before the house is enclosed may be subjected to rainstorm, but the wetting is mostly on the exposed surfaces and will dry out quickly in dry weather without causing damage.
Lumber stored in closed piles may soak up and retain water, and drying out will be very slow. This condition should be avoided as it may lead to stain and decay.
Pile of lumber should be placed on skids raised off the ground and covered with a sheet of water proof material to shed water.
Window and door frames are usually the next items to be installed after the roofing. If the frames are delivered before they can be installed, they should be sheltered until they are used.
Good wood frames are costly items, and exposure to the weather will nullify their good construction, especially if the frames have window sash installed.
Insulation, interior wall and ceiling finish, wood siding… can easily be stored inside.
Heavy items like gyproc boards should be distributed over the floor area so as not to overload the floor joists. Heavy loads concentrated on one spot may cause permanent deflection in the floor system.
The first and second floor systems are usually engineered for live loads of 40PSF and dead loads of 10PSF (add 5PSF for 1 ½” thick light weight concrete slab used for infloor heating).
Deck loads are calculated for 10 PSF dead load and 60 PSF live load as people may congregate in large number on deck during social gatherings for example.
If the decks are not covered by roof, local ground snow load must also be included in the structural calculations.
Hot tubs live load is 100 PSF and extra support is required.
The dead load is the accumulative weight of all structural members, the fixtures and permanently attached equipment.
The live load is the weight that is superimposed on the structural components by the use and occupancy of the building such as furniture, appliances and people.
Hardwood flooring, interior trim and millwork should not be stored in the house until after the basement concrete slab has been poured and allowed to dry, as the air moisture given off may cause the kiln dried material to swell, resulting in excessive shrinkage after materials are installed.
Framing (rough carpentry):
Prior to sill plate installation, contractor must inspect concrete work condition and compare all site dimensions with foundation plan dimensions. Sill is installed taking care to square the building in the process. To verify squareness of sill plate installation, measure both diagonals from corner to corner of plates. Both diagonals should be equal with a tolerance of +/- ¼” to ensure log work will fit squarely over floor system and sill plate below.
If the foundation is unacceptable to the building tolerances, general contractor is to stop all work and immediately inform the owner.
Beams:
I-beam is the most commonly used shape for steel beam. All structural steel must be painted for rust protection.
Wood beams are of three types: Solid, built up and laminated.
A built up beam is usually made of three or more 2x lumber set on edge and spiked together from each side with 3 ½” nails. The first two nails are driven near the end of each piece of lumber. Additional nails are driven not more than 12” apart in each row. Butt joints in each member are located over supporting post or within about 6” of the quarter points in the span.
End of beams should bear 3 ½” minimum on the concrete wall or columns.
If wood beam is untreated, it should be separated from concrete by impermeable membrane. Laminated beams are to be to engineer specifications.
Floor joists:
After the sill plates have been leveled and anchored, the joists are installed, located and spaced according to the design.
Any joists (dimensional lumber) having a slight bow edgewise should be placed with the crown on top. A crowned joist will tend to straighten out when the sub-floor and floor loads are applied.
All joists should have a minimum of 2” bearing support.
Flush framed joists to be fastened top beam with fully nailed joist hangers.
All floor openings to be framed with double trimmer joist and double header joist.
Install double joist or solid blocking under all framed partition walls. Install solid blocking between joists under all concentrated loads to transfer load to support below floor system.
Install solid blocking or squash blocks in floor system directly under log walls to transfer log wall load directly to concrete walls and foundation footings.
Joist may be kept from twisting by cross bridging, blocking, strapping and the use of glue in addition to nailing when fastening the plywood tongue and groove sub-floor to the joists.
Sub-floor:
Unless otherwise noted in attached plans, first floor sub-floor should be ¾” T&G plywood over frame joist at 16”o.c. and second floor should be minimum 5/8” T&G plywood.
Plywood panel should be installed with the surface grain at right angles to the floor joists and with the end joints staggered and nailed along the edges at 6” on centre and 12” at intermediate supports.
Floor stiffness can be greatly increased and floor squeaks minimized by applying elastomeric glue between the floor joists and the plywood sub-floor. Thus the plywood and joists act together as a series of stiff t-beams that help prevent differential deflection between joists.
Glue applied in the plywood tongue and groove joints will further stiffen the floor system.
Wall framing:
First floor frame partition walls in a log home must allow for settling of stacked log walls in handcrafted and manufactured construction styles (unless the logs are staggered lagged to each other into static position and chinking is used to fill forming gaps between stacked logs as wood looses moisture content and shrinks in diameter). This is done by building two top plates with the extra top plate attached to the underside of the second floor system and a settling space between the plates (6” for green logs and 3” for dead standing logs for example). Use a shrinkage trim board at top of each side of partition wall to hide settling space. The trim is only nailed to top plate at ceiling. A frame partition wall can only be nailed to a settling log wall with nails hammered into log thru a slotted stud to allow nail to travel down as logs settle.
Interior partition walls need to be 2×6 at 16”o.c. to allow for second floor bath drain pipes, vents and water lines.
Roof:
Log home roof systems are to protect the roof log beams and log walls around the perimeter of the house against weather damage.
This is achieved by providing extra wide overhangs (I recommend at least 5’ overhang and roof rakes at gable roof extension).
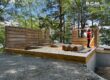
Covered warp around porches to protect first floor log walls from rain and sun are an excellent protection.
No log ends should be extended beyond the roof line and the roof-line should actually extend minimum 3” beyond the log ends.
Use thick massive overlapping fascia boards at roof line around perimeter.
If design calls for log ends extending beyond the roof line, then wrap log ends with durable metal flashing. Exterior logs should have a coat of bee wax or others applied to seal exterior log ends to weather to prevent exterior moisture to enter those log ends and rot the logs.
A common log home roof system includes ridgepoles, purlins (horizontal logs parallel to ridge), log rafters (from ridge to fascia along the roof slope), log posts and log trusses.
As the log roof members shrink in diameter when they loose moisture content, steps must be taken to seal forming gaps (between logs and framing) from weather and insect infiltration. Roof logs must be slightly notched to house exterior and interior wall finish and expandable foam gasket must be applied at those locations.
Metal flashing must be installed where frame gable walls sit on plate logs to deflect wind driven rain away from top of plate logs.
All flashing around chimneys must accommodate settling by installing heavy gauge flashing and counter-flashing which must freely slide vertically past each other as log walls settle.
No roof combustible material is to be less than 2” from masonry chimney. Do not allow log work or roofing system to be in contact with a free standing chimney unless provision for vertical settling are applied.
Fire safety:
Garages attached to living space must have a one hour fire separation consisting of 6” minimum log wall thickness and/or a 5/8” type “x” gypsum board on all walls and ceilings, and as well a 20 minutes fire rated door assembly with automatic closing device and smoke gasket. A minimum of one battery operated smoke alarm detector must be installed in the house.
Add smoke detector in basement to be wired with other smoke detectors in the house.
Install a smoke detector in each bedroom and outside bedroom hallway. If smoke alarm is triggered, it must be heard in all bedrooms.
Electrical:
If set of plans includes an electrical plan, location and amount of electrical outlets is usually designed for minimum electric code requirement. The electrical contractor must verify the electrical layout with the owner before starting work.
The electrical contractor must calculate the adequate amp service for the house, supply and install lateral service to the building, perform all electrical wiring, bring required power to all appliances, meet all applicable code requirements with accommodations for pre-wiring and wall settlement where necessary.
Usually switch and outlet boxes are hidden in the mortise log with the cover plate flush with flatten portion of log at that location.
Wall electrical outlets are usually wired down from electrical box thru log wall down into the sub-floor space.
Electrical switches by doors are wired from sub-floor space thru space at door jamb spline board to mortised switch box. Do not use conduits in a log wall.
Pre drilled vertical holes in a log wall are a minimum 1 ¼” diameter to fish wire thru.
All bathrooms without open-able window must have an adequate exhaust fan installed.
Plumbing:
Plumbing contractor must consider the need for settling allowances in all plumbing runs.
Plumbing runs should be installed in frame interior walls and never in a log wall as future repair would be difficult to impossible.
Water lines to second floor bathrooms must have a flexible loop that opens as the second floor settles down.
Waste and vent pipes use a series of compression and expansion fittings to accommodate settling, with blocking to support top and bottom compression fittings and allow them to compress.
Plumbing vents may be strapped or blocked at lower part, with roof settling around vent and counter-flashing sliding along flashing to allow settling.
Cabinetry:
Cabinet maker must check all dimensions on site before starting any work.
Cabinets must not be secured to settling log wall unless settling accommodations are applied. Upper cabinets are hanged at top by screwing them to one log only.
Counter cabinets are screwed to floor and nailed at top of slot to log wall for settling.
Flatten log above splash board to allow settling.
Another method is to install cabinets over log wall interior frame wall and channel wiring and plumbing in frame wall cavity.
Insulation and thermal efficiency:
Roofs and exterior frame walls are usually insulated with batt fiberglass or Styrofoam rigid panels. Log walls have loose fiberglass or sheep wool installed in the lateral grooves and notches during log shell erection at building site.
Most important is to use foam gaskets on both sides of laterals and notches to ensure an air leak free log home.
P shape foam gaskets are most easy to install by stapling them directly to log inside line of contact between log stack.
Cedar, pine and spruce have about R1.5 per inch insulation value.
D-fir being a denser wood for example has R1.2 per inch value.
The thermal value of a log wall is fairly proportional to the diameter of the log but also depends on the mass of wood at the perimeter log walls. A log home is a typical passive solar system because of the mass of wood in play around the living space.
The more mass of logs, the less pronounced the inside temperature will swings from day to night. As temperature drops at night, the heated inside of the log building tends to retain its warmth much longer than a frame home.
In summer that difference is even more striking. A log home will stay much cooler through the day if it has a chance to cool down at night by adding second floor fans to exhaust day accumulated heat and let cooler night air in. Depending on the design, the mass of logs will reduce cooling costs drastically if not eliminate it in summer depending on location.
As a log wall looses moisture and shrink, lateral checks in logs will appear. The checks at the cross corners should be caulked to seal off air infiltration. A final sealing of the log home should be applied when the logs have reach moisture content equilibrium with the local outdoor in three to five years from construction time depending on original log moisture content.
Log home maintenance:
With adequate wood care and preventative maintenance, your log home will last centuries.
Most woods contain naturally occurring oils that resist weathering and decay. But with time these oils are leached from the wood and need to be replaced.
Regional climates will dictate general preservation techniques.
The first general rule is to prevent water to come in contact with the logs.
Logs must be thoroughly cleansed with a solution of soap and bleach, completely dried before applying a preservative solution containing a water repellent and mildewcide.
Reapply the solution until the logs will no longer accept any more preservative.
If sun damage especially on south and west side of the house is anticipated, apply a preservative that contains oils with pigments as ultraviolet blockers. Do not apply an impermeable finish such as varnish or paint to the surface of logs.
Follow application instructions to the letter and never apply a finishes not specifically formulated for logs.
![]()